Hammersley Trophy
Notes on creating a off-site clone of affcc.uk
These notes cover the use case for creating an off-site clone of the managed host / wordpress instance known as affcc.uk which is managed by Ionos.
There are daily backups of affcc.uk performed as part of the service continuity offered by Ionos, however, these backups are not available for use outside of the Ionos service and doesn’t give us the option to create a clone of affcc.uk in a different environment to support local testing or prototyping.
Creating the backup
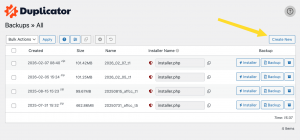
We’ve installed the “duplicator” plug-in to create a site backup, due to the size of our environment and our use of the ‘free’ version – we can’t use duplicator to create backups of all the assets on our main site, the backups time out. The backup process is split into two sections, firstly we’ll create the database and main wordpress asset backup using duplicator and then we’ll copy the image assets from the main site to our clone site. The following screenshots illustrate the steps to achieve this.
Create the duplicator backup
Take the default parameters for duplicator – with the following exceptions, a) there’s a main exclusion to not backup the wp-content/uploads folder, this stops the backup from pulling in all the club specific uploaded assets, we’ll cover this in the next step. B) note also the file type exclusions at the bottom right. c) – it’s just the database we’re backing up.
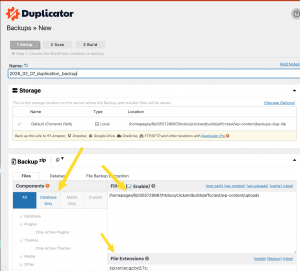
Now press “Next” at the bottom right of the page.
Duplicator now scans the site and determines if there are any issues that need to be handled. At the end there should be a screen like this.
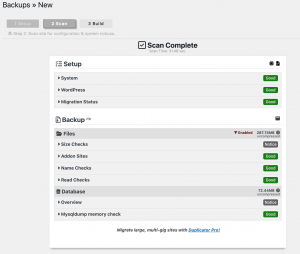
There’s a button at the bottom to build the backup, press that.
Duplicator will indicator it’s progress. 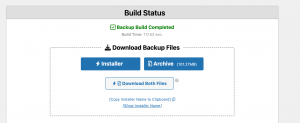
The backup is complete and Duplicator now gives you the option to download the two main backup components, download the installer.php and the archive file and put them somewhere safe, we’ll pick these up later.
Copying the contents of the wp-contents/uploads fold to your clone site.
To copy the files – you’ll need access to the Ionos host through the ionos account, contact Simon Taylor ( our webmaster ) for these.
I use lftp to do this as it also provides a way to create a mirror of the affcc.uk assets which is useful if you’ve already performed these steps before as it’ll only transfer assets that either don’t exist or are more recent. However for the first time, there’s no alternative but to pull down all the files from wp-contents/uploads/ down.
$ lftp sftp://<accountname>@home355729987.1and1-data.host
mirror -u /clickandbuilds/affcctest/wp-content/uploads <local location>
Net net, we need to have a full file system copy of wp-contents/uploads after this process and that needs to located on the clone environment.
Create the clone site
We’ll use docker to provide our wordpress instance, this will give us a well defined template to setup wordpress which we can repeat time and time again. If you’re using another means of instantiating wordpress, skip down to the “apply back” section.
Use this compose.yaml to setup your wordpress environment.
services:
db:
image: mysql:latest
restart: always
environment:
MYSQL_ROOT_PASSWORD: rp
MYSQL_DATABASE: d
MYSQL_USER: u
MYSQL_PASSWORD: p
volumes:
– db_data:/var/lib/mysqlwordpress:
depends_on:
– db
image: wordpress:latest
restart: always
ports:
– “91:80”
environment:
WORDPRESS_DB_HOST: db:3306
WORDPRESS_DB_USER: u
WORDPRESS_DB_PASSWORD: p
WORDPRESS_DB_NAME: d
volumes:
– ./:/var/www/html
– ./wp-content:/var/www/html/wp-contentphpmyadmin:
image: phpmyadmin/phpmyadmin
restart: always
ports:
– “9180:80”
environment:
PMA_HOST: db
PMA_USER: u
PMA_PASSWORD: pvolumes:
db_data:
Note, the main wordpress apache access is on port 91 ( change this if that creates a conflict, and that’s the same for any of the other ports ), this creates a db with a username/password pair of u/p which we’ll need later on. Also note that /var/www/html map onto the top level docker directory ( where the compose.yaml file is ), also the wp-content folder ( under the top level folder ) maps onto /var/www/html/wp-content, this will dictate where we put the files we’ve just downloaded.
If you need to reset/rebuild the docker images, use this command
$ docker compose down –volumes –rmi all –remove-orphans
Now start wordpress using the following
$ docker compose up -d
Wait a few minutes, open a browser and put “localhost:91” into the address bar, eventually, you’ll see a page like this
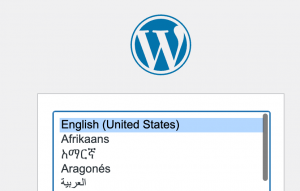
Select the language, press continue, then fill out the next form with something like this, ( the userid and password will be replaced after the backup is applied ).
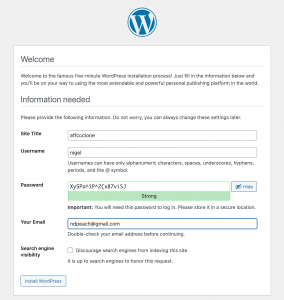
Copy the password and press “Install wordpress” button. This then presents you with a dialog inviting you to log onto the main wordpress admin interface.
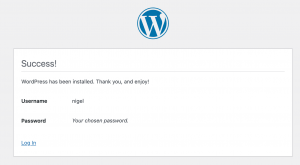
And once that’s successful, we’ve got a working wordpress instance.
Get ready to apply the backup.
Now we’ve got a working wordpress instance, we need to put the installer.php and the archive.zip into the wordpress home directory. Now, in the browser change the address to http://localhost:91/installer.php
Go down to the “setup” panel, focus on the db parameters and set them up as illustrated below.
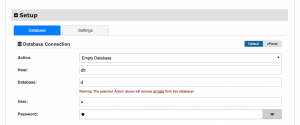
set the db name to d, the username to u, password to p ( or whatever you’ve got in the compose.yaml file if you’ve changed it )
Press validate and it should look like this.
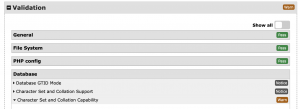
There may be warnings about the character set, ignore this. Finally, there’s a last check that you’re good to do this, as it’ll overwrite all the tables in the db.

There’s one final check.
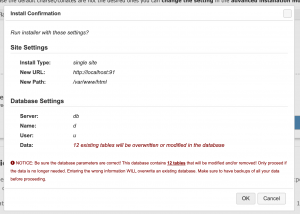
Press OK and sit back and wait, this will take a while ( it took about 3 hrs on my machine ).
Hopefully, the restoration completes successfully, it always has for me. You’ll see some comments on the summary report about removing installation files, I’ve not done this as I just keep repeating the steps every time I need to build a new instance.
If you’ve moved the contents of wp-content/uploads/* to the correct location in the file system <Docker directory>/wp-content/uploads, then everything should resolve and you’ll be able to verify that things like the competition and challenge images render correctly. Note, competition images ( may be just the thumbnails ) reference the originals on affcc.uk, this is something we’re going to need to fix at some point.
Clean up after the setup
You’ll notice that this instance may only work from the machine that’s hosting the docker container, if you want to access wp from another machine, then you’ll need to modify the wp-config.php in the main docker compose directory.
Add these two lines to wp-config.php
define( ‘WP_HOME’, ‘http://<name of machine running docker>:91’ );
define( ‘WP_SITEURL’, ‘http:/<name of machine running docker>:91’ );
and restart the wordpress docker containers.
Useful docker compose commands
to start the conainer
$ docker compose up
or
$ docker compose up -d // if you want to have no logging going to the terminal window
To stop the docker container
$ docker compose down
To remove the docker image and its dependent components
$ docker compose down –volumes –rmi all –remove-orphans
To become the unix user who owns the docker container files
$ sudo -u www-data /bin/bash
![]()
Recent Comments